The Azure Cost Monitor is a SaaS application which is extended and improved frequently. Updates take place several times a week without interrupting end users. This agile approach of software development requires continuous integration and a structured deployment process to keep quality and development on a high level. Written in javascript – nodejs for the backend and angularjs for the frontend – the application is deployed to Azure WebSites, the fully managed web hosting solution of Microsoft.
Azure supports deployment from GitHub which works very well for nodejs applications, but angularjs applications need to be compiled to minify the code and rename the images, what prevents caching issues in the browser. The guys from Codeship are offering one of the best cloud platforms to enable continuous deployment for Azure WebSites and many other services.
This tutorial describes a continuous deployment process for an angularjs application to Azure WebSites, based on Codeship. The source code is hosted in a public GitHub repository and the angularjs app is scaffolded with yeoman.
Step 1: Create your AngularJS application
First of all a new Angular application needs to be created with the following yeoman command:
yo angular
This example uses Sass with Compass and Bootstrap, so this options need to be selected in the creation wizard of yeoman. After creating the application it could make sense to test if everything is generated correctly, by starting the development server with this command:
grunt serve
grunt-wiredep is a grunt task which is responsible for updating all the HTML files and minify the JS/CSS files. This task has an issue in version 1.7.0 so it needs to be updated to version 1.9.0 via package.json. The following line needs to be replaced in the package.json:
“grunt-wiredep”: “^1.7.0”,
to
“grunt-wiredep”: “^1.9.0”,
Last but not least the updated package needs to be installed with
npm install
Bower is the component which is used to install all needed web components. The Codeship sandbox has no bower installed out of the box, so the dependency needs to be added with the following command to the package.json as well:
npm install bower –save-dev
Besides that, the commandline interface for grunt needs to be part of the package.json, so that it becomes installed into the Codeship sandbox:
npm install grunt-cli –save-dev
Step 2: Beam Compass & Sass into the Codship sandbox
YeoMan is using Sass and Compass for modern CSS compilation, so it’s required in the Codeship sandbox as well. All used tools are ruby gems so a simple Gemfile with the following content defines the dependencies:
source “https://rubygems.org”
gem ‘sass’, “3.2.9”
gem ‘sass-globbing’, “>= 1.1.0”
gem ‘compass’, “0.12.2”
gem ‘breakpoint’, “2.0.5”
gem ‘singularitygs’, “< 2.0.0”
gem ‘chunky_png’, “1.3.3”
Alle components need to be installed with the command
bundle install
which generates the Gemfile.lock.
Step 3: Activate the CI build in Codeship
All changes described in the steps above should be commited in a GitHub repository. After that everything is prepared to create a new project in Codeship which is connected to the GitHub repository:

The following setup commands of the Codeship projects should be entered to install all dependencies and kick off the angular build:
rvm use 1.9.3
bundle install
npm install
bower install
grunt build
All the build output is stored in the dist directory. After all preparation, a simple push to the projects GitHub repository lets Codeship start building your application instantly. The first build takes a little bit longer because Codeship prepares the dependency caches. The second one should be done in about 1:30 minutes.
Step 4: Prepare your Azure WebSite
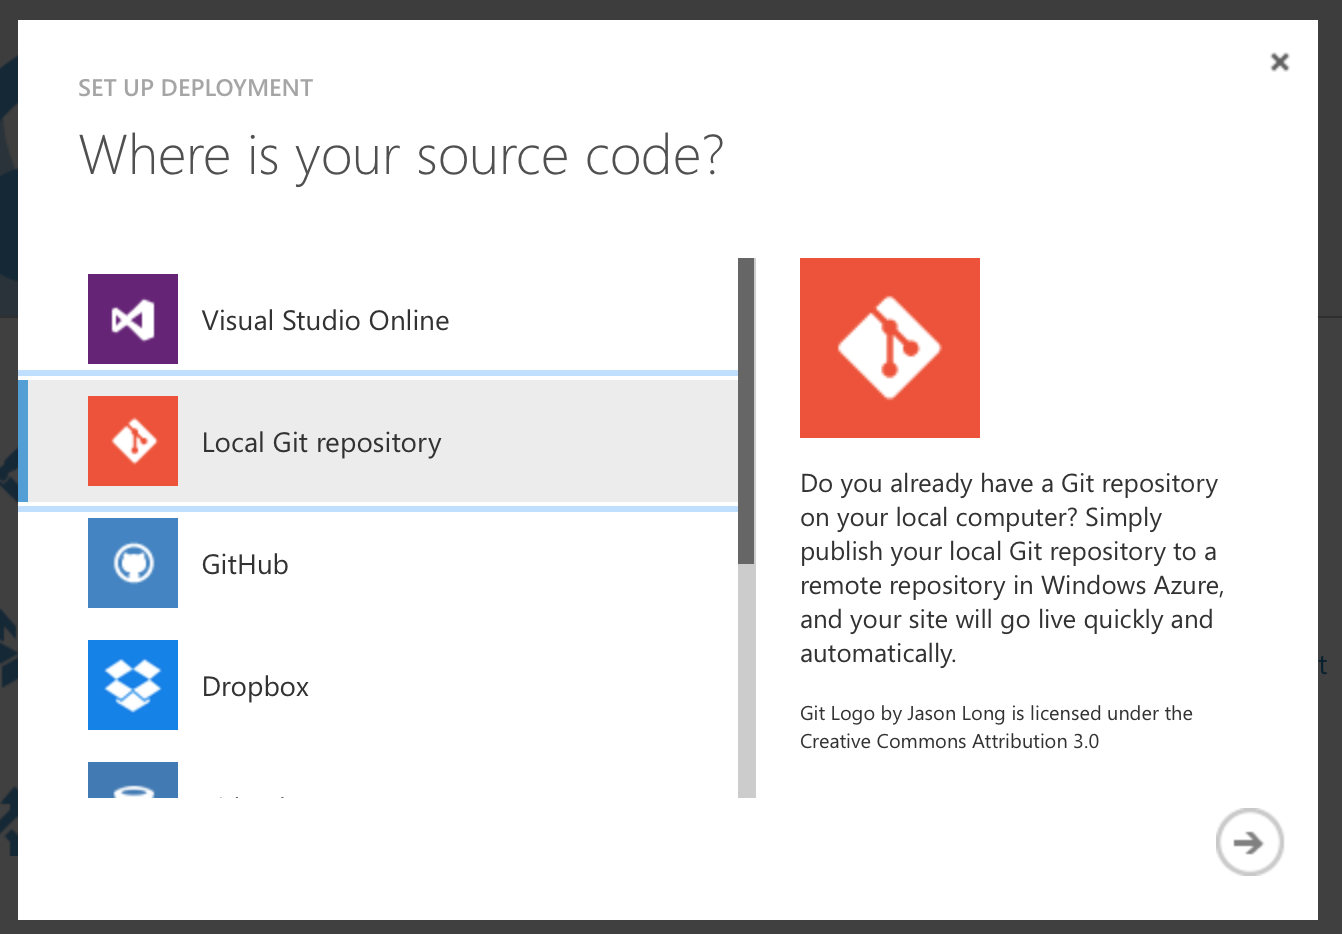
A new Azure Website needs to be created in the Azure Management Portal. Every Azure WebSite supports different ways to publish content, besides traditional FTP Azure WebSites supports deployment from source control. In the specific case of this tutorial the deployment from source control feature should be set to the option “Local Git Repository”:


This means Azure hosts a git repository and everything that is committed into this repository will become active in the Azure Website. After that, the next goal is to let Codeship commit all changes into this repository after every successful build.
Step 5: Bring deployment online
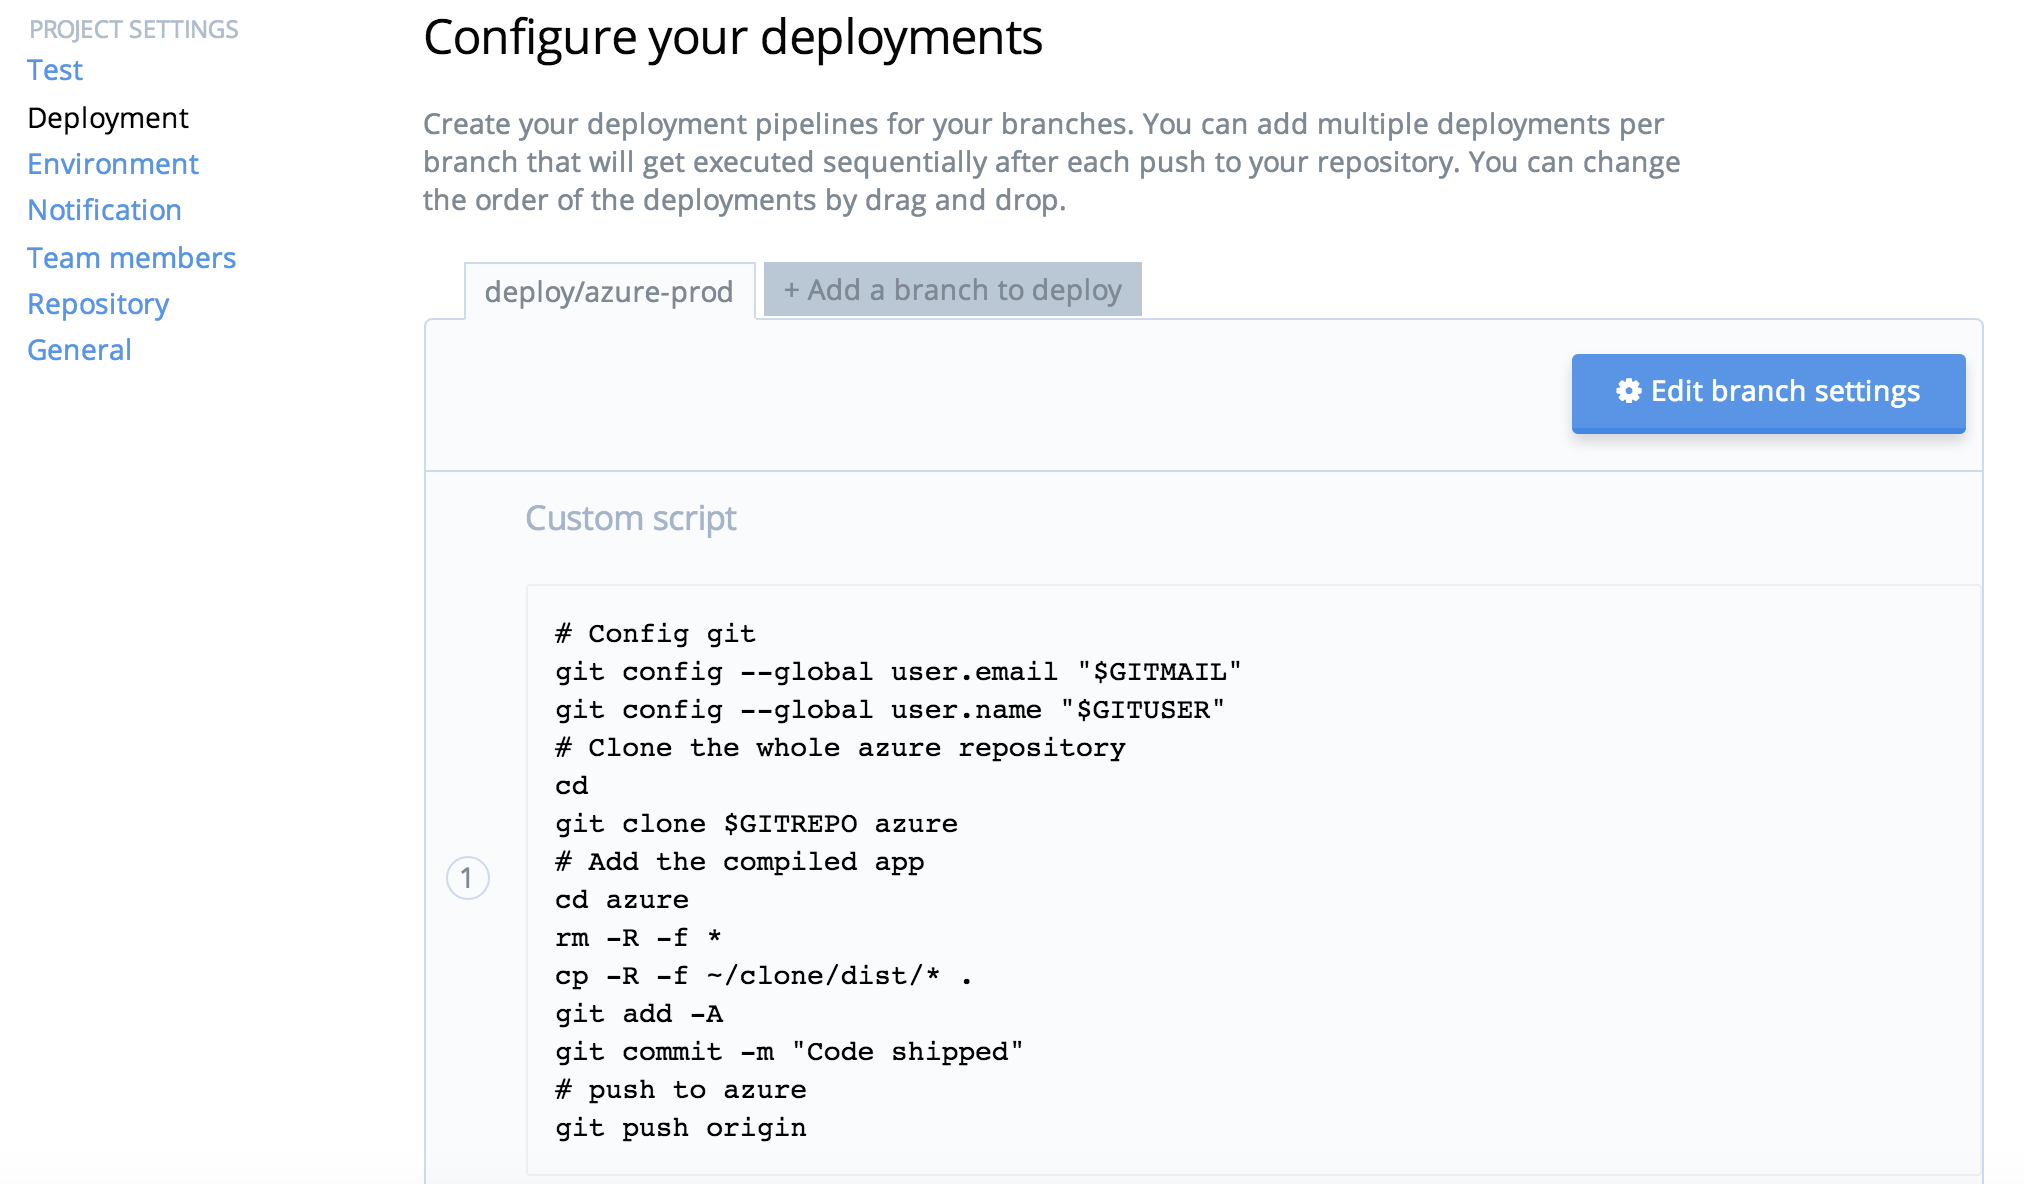
Codeship allows to add a deployment script under the project settings for specific branches. In this sample every committed change from the master branch is deployed. In a production environment the system should only be triggered from a specific deployment branch, e.g. deploy/azure.
The following script deploys the compiled angular app to the Azure Website:
# Config git
git config –global user.email “$GITMAIL”
git config –global user.name “$GITUSER”
# Clone the whole azure repository
cd
git clone $GITREPO azure
# Add the compiled app
cd azure
rm -R -f *
cp -R -f ~/clone/dist/* .
git add -A
git commit -m “Code shipped”
# push to azure
git push origin
Last but not least, all used variables need to be stored as environmental settings in Codeship. This prevents that Codeship prints out sensitive data to the logs and decouples configuration settings from deployment script:

The GITREPO variable contains the https based git URL from the local git repository of the Azure WebSite. It includes username and password in the URL, e.g.
https://{{user}}:{{password}}@{{website}}.scm.azurewebsites.net:443/{{website}}.git
The deployment credentials can be found in the Azure portal for the Azure website.
Finally a simple push into the Git repository of the project triggers a build via Codeship and a deployment into the right Azure WebSite. Users do not loose access to the SaaS application except for a couple seconds after redeploying when the IIS load the new application.
This fully automated process supports every agile software development process and helps you to focus on making features and not updating servers.
Happy Deploying 🙂